Assalamualaikum semua! Apa khabar? Saya sihat… anda juga… etc, etc.
Okay, so have I mention before that running ubuntu live from usb stick feels actually faster than an installed Ubuntu? Yes, there are several reason for that, and one of those are the installation is compressed into a squashfs image. A squashfs image should be about three times smaller than an uncompressed directory. Canonical use squashfs in the live image so that the whole ubuntu installation could fit into a CD (its DVD now). The problem with squashfs image is that, it is a read only image, meaning you can’t install anything the live image. Of course, there are ways to overcome this, like unetbootin’s persistant storage, but that is a different story. So, bottomline, when you install Ubuntu, what the installer does actually is it uncompress the squashfs image to your hard disk. Because the uncompressed file is about three times bigger, the hard disk will need to read three time more data to start your system. You can, of course, manually set up an ubuntu intallation into using a partial squashed installation by following this guide, but that for me is quite a hassle to do manually. So, I’ve come up with a script I called Squasher written in bash that will automatically compress your /usr into an image and set up fstab and help in updating the squashfs image.
Usage
So, here is how you use it. First download the script from its github repo. Copy it to wherever you want, just not in /usr. Then, install the package squashfs-tools and aufs-tools. You can use the command “sudo apt-get install squashfs-tools aufs-tools” to install it or you can click this link which supposedly will open ubuntu software center and install the package.
For example, I’ve put the squasher.sh in my home directory. Don’t put it too many folder because we will execute it in command prompt.
Then, right click on it, and press properties. Make sure you checked “allow executing file as program”. This will come in handy later.
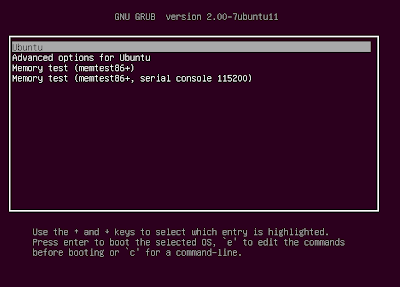
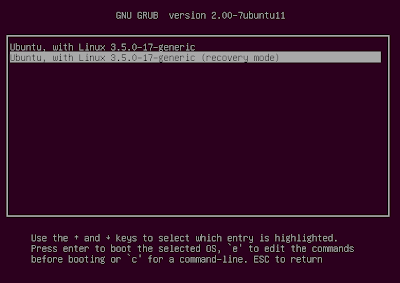
Next, restart and enter recovery mode. If you use ubuntu 12.10, the recovery mode is in the “Advanced option for Ubuntu”
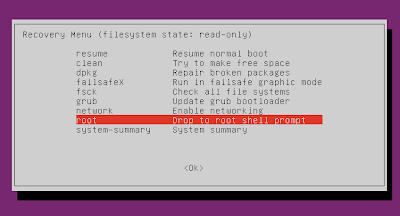
Then, on the Recovery Menu, choose “Drop to root shell prompt”.
Notice, on the bottom of the screen, you can now type stuff. Navigate to where you keep the script, and run it. If it says something like “access denied”, you probably did not check “allow executing file as program”. As a workaround, type “mount -o remount,rw /” and “chmod +x squasher.sh”.
Next, it will prompt to squash /usr. The script will start modifying the system after this, so it asked you to continue.
If you pick Yes, it will start by compressing /usr into an image.
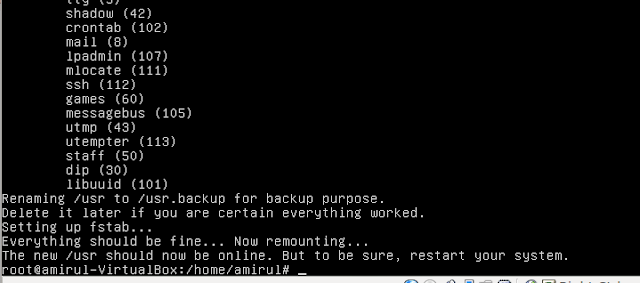
And if everything goes well, you should be prompted to restart your system.
By the way, the old /usr is not deleted. It had only been renamed to /usr.backup/. Delete it manually if you are sure everything is ok.
Now, your partial squashfs system has already been set up. You could see some load time improvement when starting applications. You can install new application, and do stuff normally. Be advised though, that new application will not be automatically compressed. In this setup, any write to /usr will be written in /var/squashed/rw. While you squashed image is mounted in /var/squashed/ro. Aufs then will merge both of these forder into /usr.
As for example, the screenshot above is right after I squashed my system. The /var/squashed/rw is empty because I have no installed anything.
Now, for example sake, I install gparted. Notice that the gparted binary is in /var/squashed/rw/bin. But it is not compressed.
To recompress it, repeat the procedure to start the script. the script will automatically detect your configuration. Make sure the parameter is about the same as above. If you did not do anything with your fstab, this should work just well.
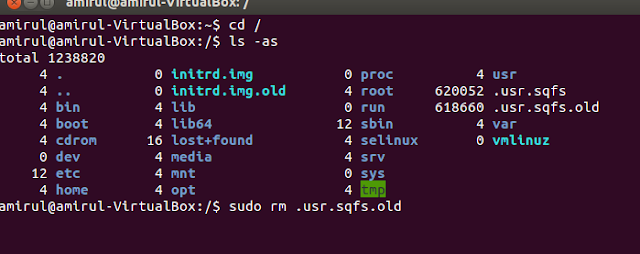
Notice on the screenshot above there are two image with size about 600MB. Delete the one with the ‘.old’ postfix, once you are sure everything is ok.
The same is also true for the read write branch. On the screenshot above, the read write branch is empty. The old rw branch has been renamed to “rw.old”. Delete it and you should see that your newly installed application is still available and compressed.
Performance gain.
On a Virtualbox I’ve notice that it does start faster, but I have no number to prove that. On my laptop, and a stopwatch, I did not see any start up loading time improvement. Uncompressed or compressed, it took 55 second to boot and start chromium. But the number do strip down to 40 second once I’ve reconfigure ureadahead. I do notice however, is that nautilus and common application do load faster in this configuration. Unfortunately it is still not as fast as using a thumbdrive. Probably because the script only compress /usr.
Summary
So if you are still using a conventional hard disk, squasher may be worth a look. Until btrfs become optimized, a squashfs image is probably a solution to speed up loading time by compression.
WARNING: If at some time you dist-upgrade your system, AppArmor profile for some of the updated file may be loaded after you restart. I’m still not sure how did this happen. So you could try removing apparmor completely, or ‘invoke-rc.d apparmor teardown’ for temporary solution.


